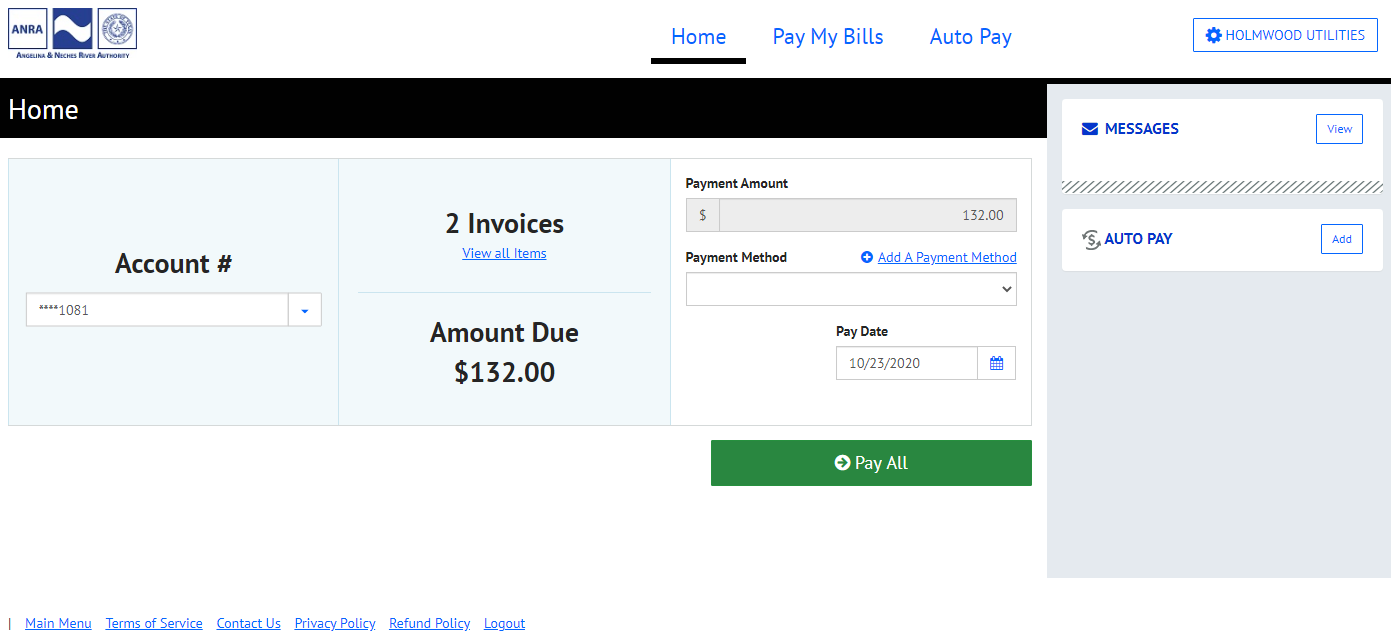
Step 1 – Auto Pay Settings
Click the “Auto Pay” link on the right hand side of the top menu or the “Add” button in the auto pay section of the right hand sidebar.
Step 2 – Recurring Payment Intro
Click the green “Create New Recurring Payment” button.

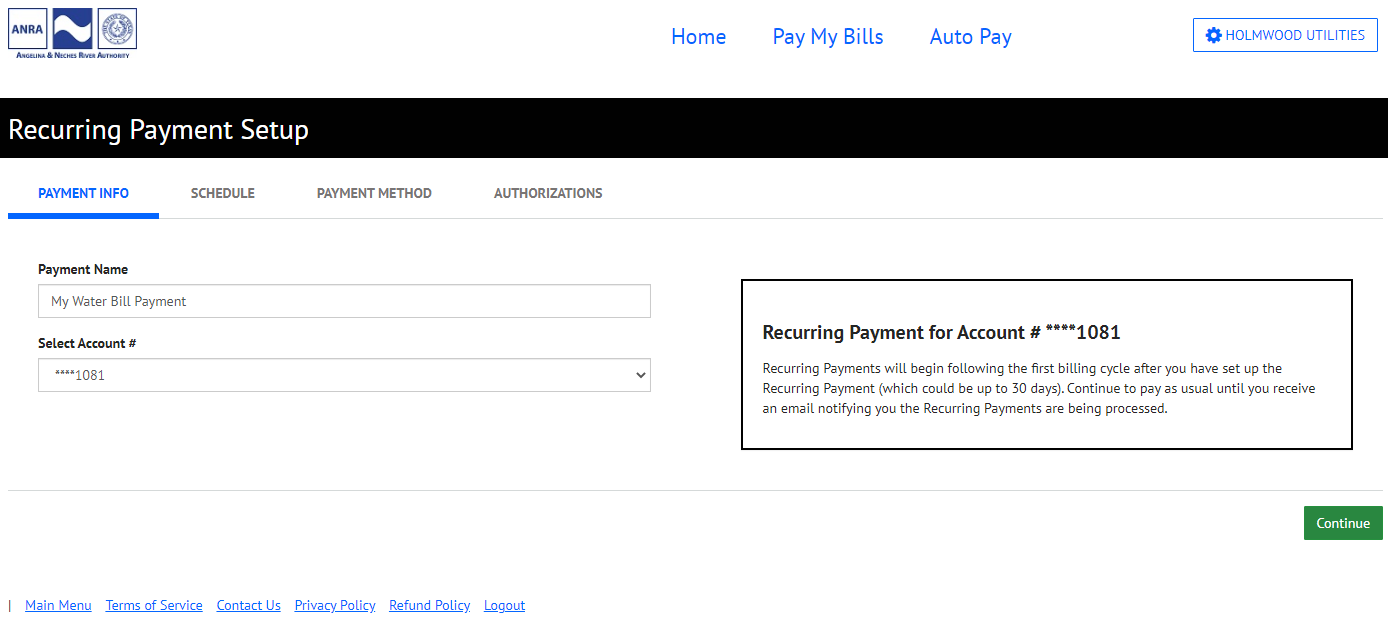
Step 3 – Payment Info
You must give your recurring payment a name. The name is only for your reference if you need to edit the payment later, so you can call it whatever is meaningful to you. For example, “My Water Bill Payment” or “Prairie Grove Auto Pay”.
If you have multiple linked accounts, you can also choose on this screen which account this recurring payment will be applied to.
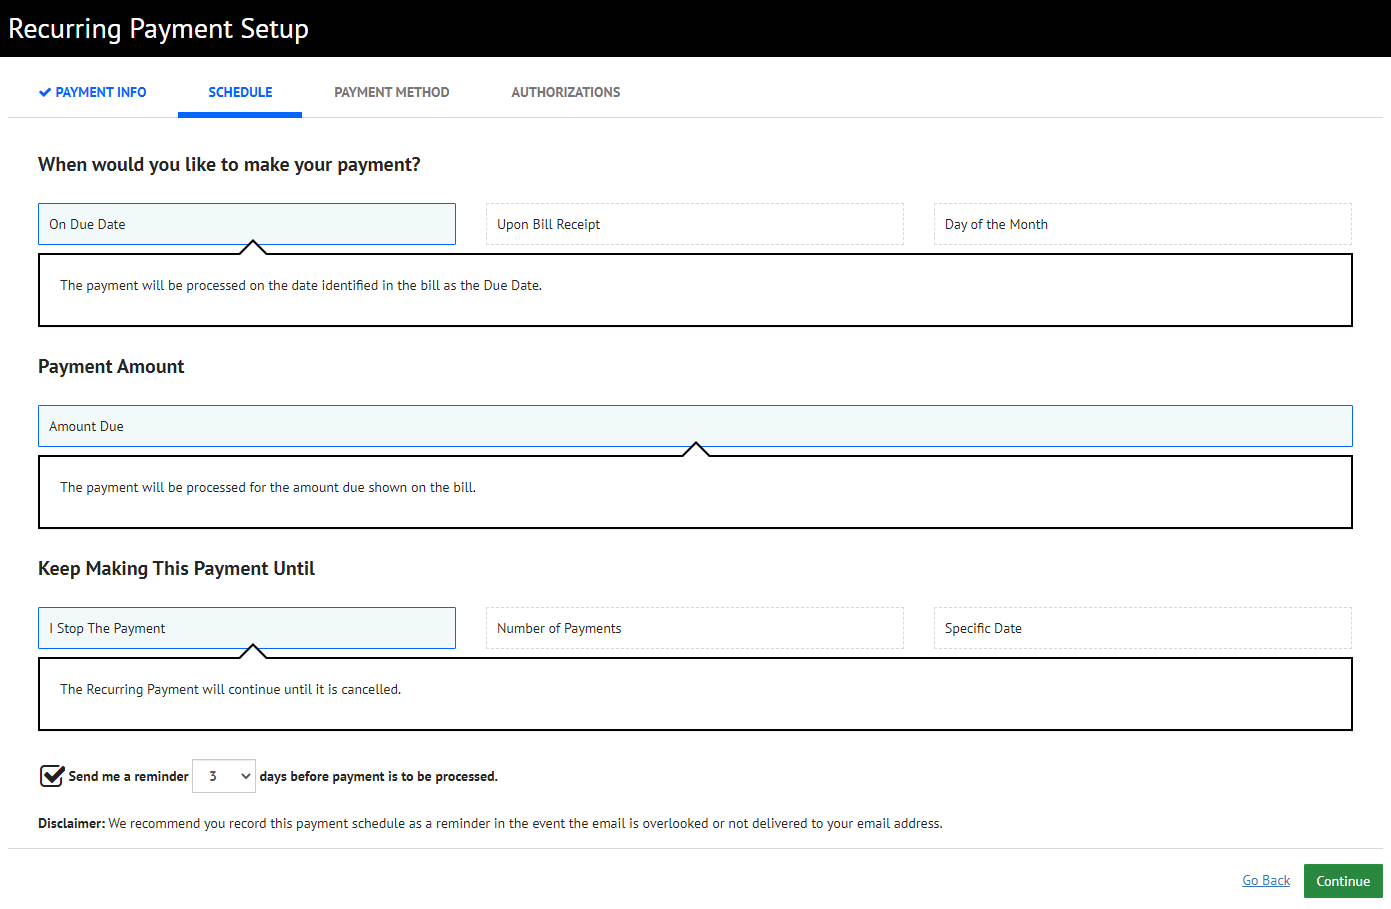
Step 4 – Schedule and Reminder
Choose when you would like to schedule your payment. You have three options.
- On Due Date: This will be the 10th of every month.
- Upon Bill Receipt: This will be the business day after the bills are uploaded to the portal. Typically this happens in the final week of the month.
- Day of the Month: You can choose a specific day you want your bill to be auto paid, but keep in mind that you will need to choose a date which falls before the due date of the 10th.
The third question is how long you want your bill to be on Auto Pay. Again, you have three options.
- Until I stop the payment: This will continue the payments until you manually disable them or your payment fails due to a card or bank account issue. You can edit/disable recurring payments by returning to the Auto Pay page from the top menu at a later time.
- Number of Payments: Enter a number and the system will make that many payments and then stop.
- Specific Date: Choose a date, and auto pay will remain active until that date, and will automatically stop after the chosen date passes.
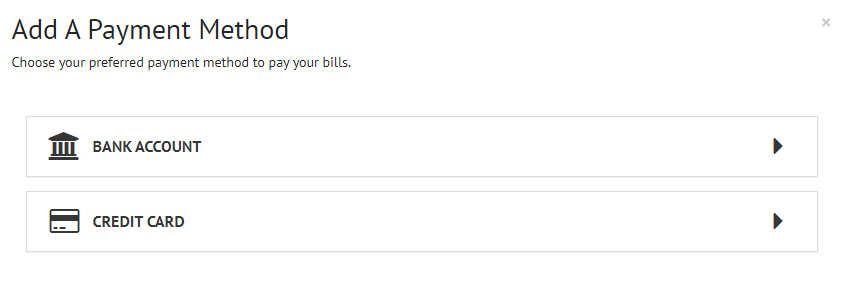
Step 5 – Payment Method
Choosing your payment method.
If you have already added/saved a payment method, it will be available in the drop-down menu.
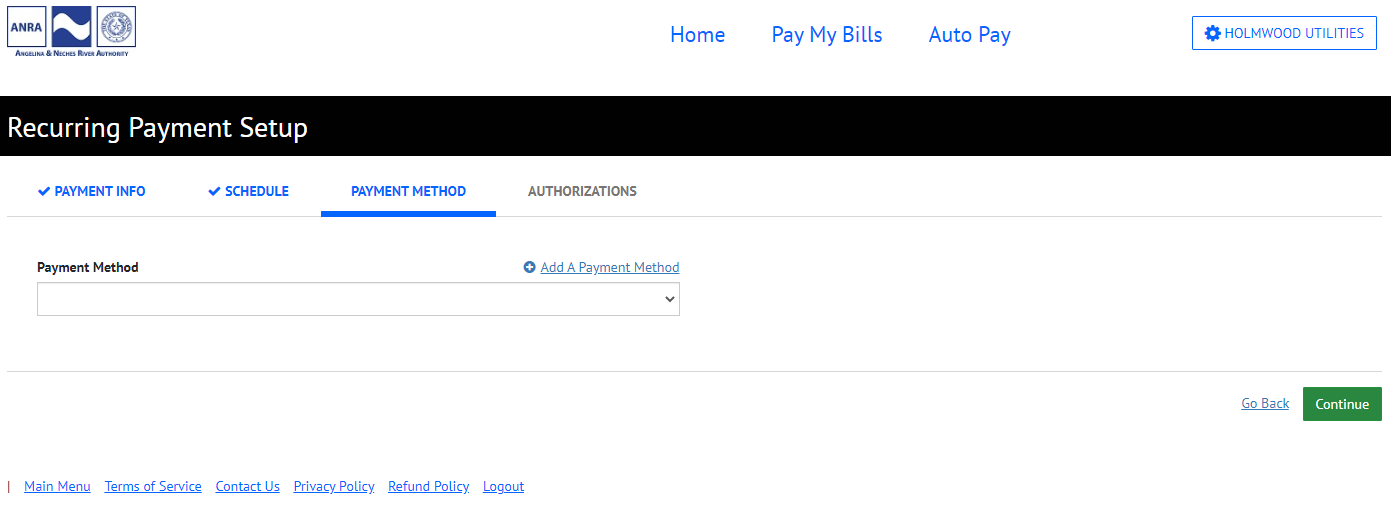
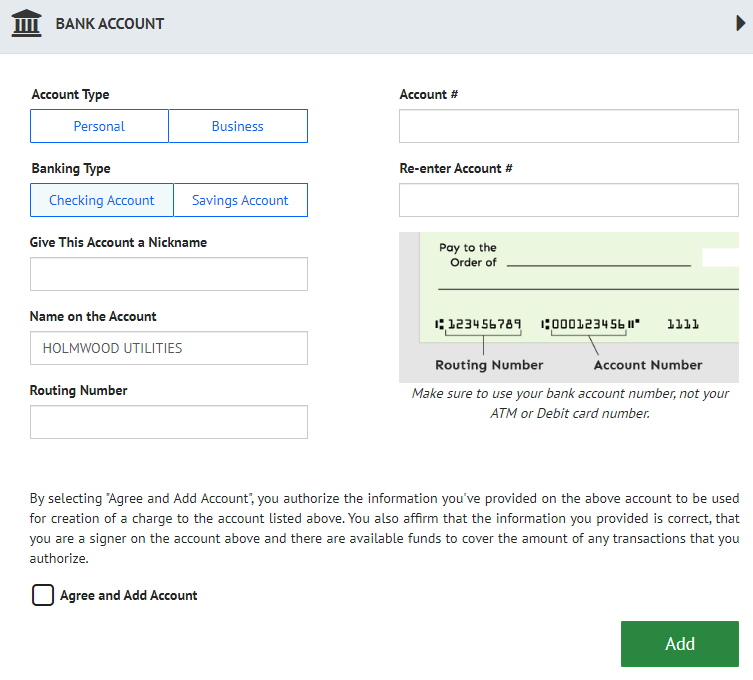
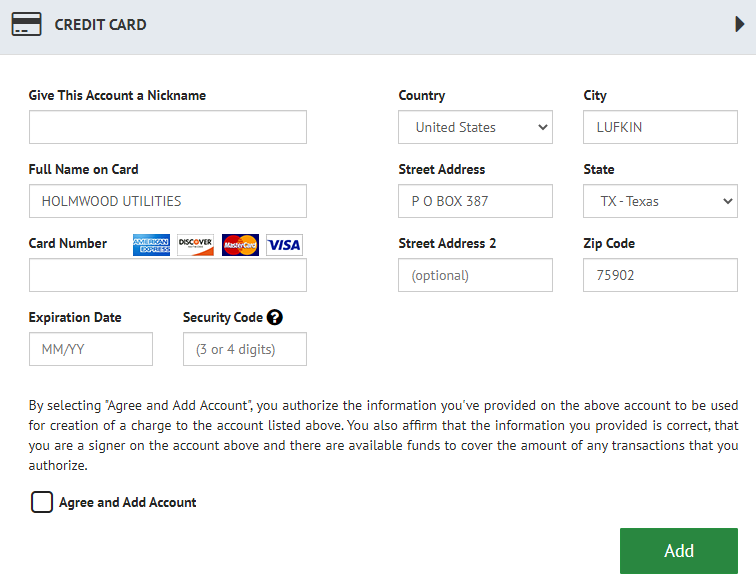
If you haven’t added a payment method, you will select the option above the drop-down menu labeled “Add a Payment Method”. You can then add a bank account or a card account. Once you have completed entering your information and checked the “Agree and Add Account” box, click the green “Add” button.
Once your payment method is added and chosen, click the green “Continue” button.
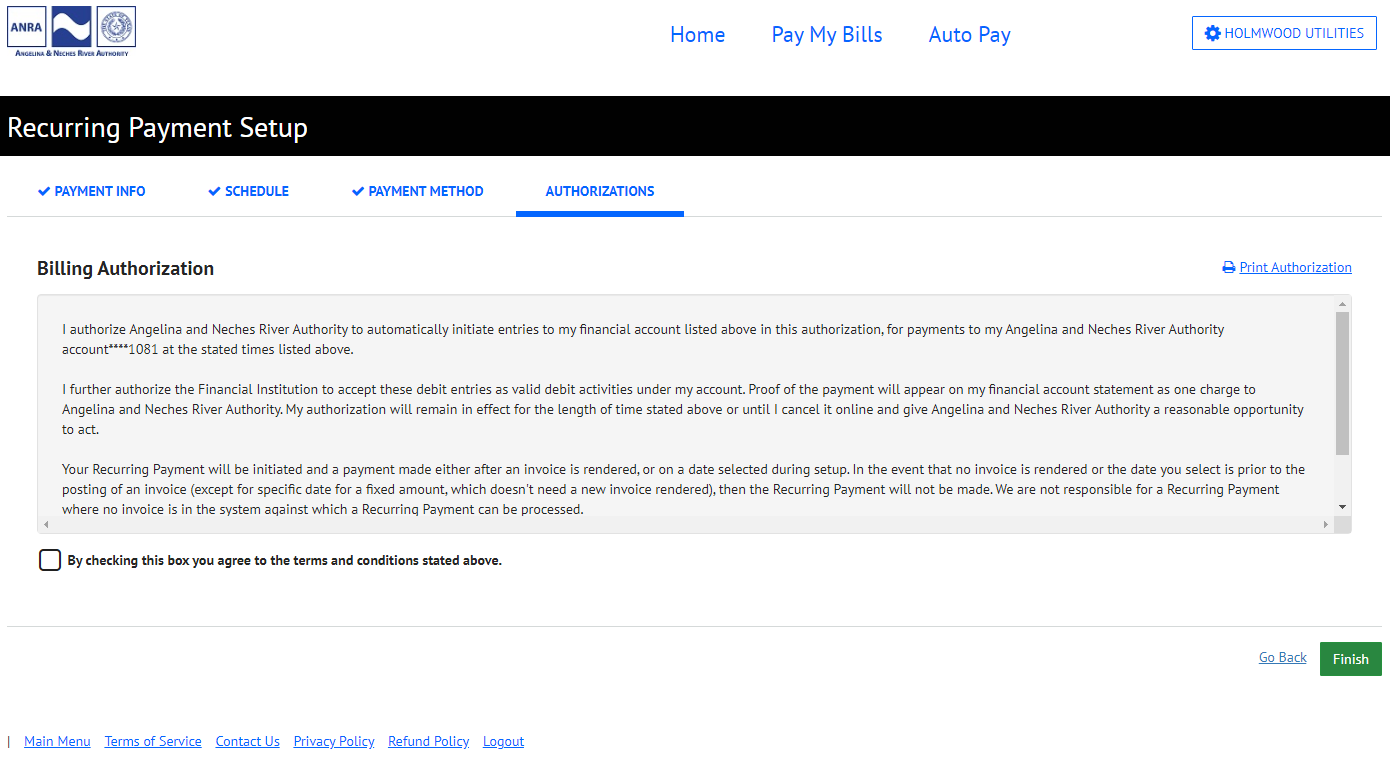
Step 6 – Authorization
On this screen, you will need to check the box to agree to the terms and conditions to authorize payments to be made on AutoPay.
Then, click the green “Finish” button.
Step 7 – Verification
It should then take you back to the main Auto Pay page, where you can review or delete your recurring payment information.
